I posted a little while about deck modifications and my plan to start with the Blue Messiah deck. My plans changed a bit when I got my hands on this one, though and I decided to start with The Star Tarot by Cathy McClealland instead.
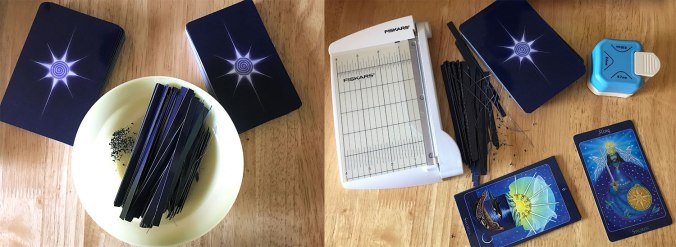
The first thing I did was get out my mini guillotine cutter and my corner rounder. I then resized one of the cards (the King of Swords), working a little at a time to cut the card down until I found a size that was comfortable and yet wasn’t cutting off the titles. Although this tarot deck would be easy to read without the titles, I really didn’t -want- to lose them. I might change my mind sometime in the future, but for now I’d rather they stay.
Once I found the size I wanted, began cutting down cards, one at a time. I did all of the tops and bottoms first, and compared each to the King of Swords to ensure they were uniform size, then went back and did the sides second, repeating the comparison with the King of Swords with each card. I then rounded the corners using my corner punch.

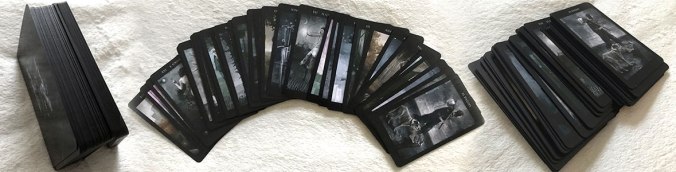
Half way through the deck, I took a pause to take a few pictures for a size comparison between the original size of the cards, and the cropped size.
I’m not entirely pleased with my corner punch at this point. On a card without a clear coat, the punch I’m using cuts nice and clean. These cards, though, have a sort of clear laminate type of coating on them, and I’ve noticed that my corner cutter appears to have a little trouble with that coating. Some of the corners ended up a little… not ragged or uneven, but with tiny tags of uncut laminate slivers. It’s probably not something I’d have noticed if I hadn’t decided to also edge the cards.
I’m not a huge fan of that type of laminate on the cards, either, incidentally. It makes the cards feel almost “sticky” when shuffling. It was the reason I chose this deck to start with, actually. Between the size and the stickiness, I figured I would never used this deck unless I could make it more user friendly.
So the next step is the inking of the edges.

I used Distressed Ink for the edging, starting with stamping the edges using Seedless Preserves (purple) for an uneven finish around the edge of each card. This left a bit of white exposed in places. I then used Salty Ocean (blue) in a rub around the edges and over the purple.
Above, I’ve posted a photo of the deck half done with cards set out to dry between stamping. I left the cards to dry for thirty minutes between each application of ink, and rubbed the edges with a rag after the wait was over each time to remove any excess.
The application of the darker ink (purple) done unevenly followed by the lighter (blue) ink afterward created a mottled deep blue effect that I think matches the card’s border and back really well.

I did take about twenty cards out and use the purple in a second sweep on top of the blue, darkening the color as a result, which once shuffled into the finished deck, resulted in a darker blue than the original results.
I then let the deck sit out for 24 hours to ensure that the ink had fully dried on all of the cards.
I’m really happy with the end result of this modification. I think the deck looks much better, and the size is much easier to handle. The only thing I’m not a fan of is the laminate coating that I mentioned earlier. I’m hoping that with a good amount of use, that it’ll lose some of its stickiness. The one thing I was worried about with resizing the deck is that I’d damage whatever shuffle-ability they had. But, I managed to get the sizing uniform enough that it isn’t an issue.

The last pictures in this post are of the finished deck and the “swaddle” that I chose to home the deck in.
This deck came with a huge box (and a book). I don’t keep boxes when they are oversized, so I have a variety of decks that are wrapped in a “swaddle” of 100% cotton in place of a box. For this deck, I found a fat quarter that I feel fits the deck perfectly. Not just in color, but in the design of the print as well because, to me, it looks like the night sky.